To configure your custom sending account, follow the steps below:
⚙️ Configuration
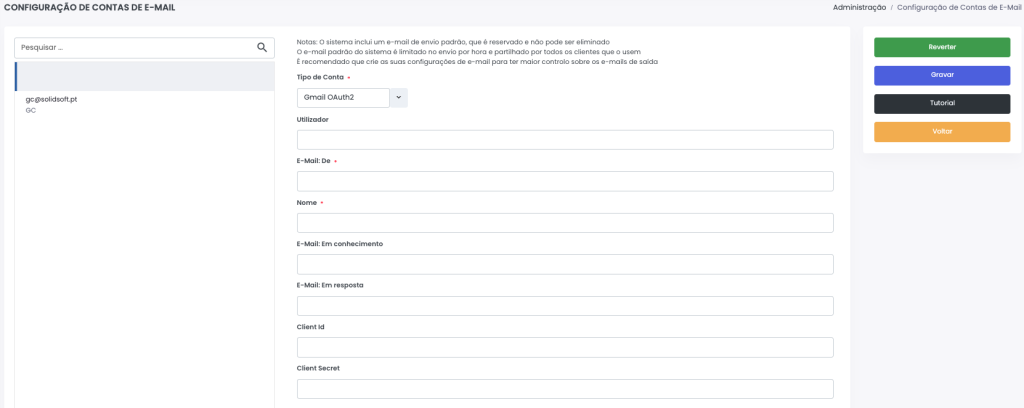
Go to:
Administration >> Email >> Sending Accounts
-
Click on Add Line
-
Fill in the required information:
- Account Type – Select
Basic,Gmail* orMicrosoft* (see note below) - Server – Refer to your email service provider’s information
- Port – Refer to your email service provider’s information
- SSL – Refer to your email service provider’s information
- Username – Email account login credentials
- Password – Email account login credentials
- Email: From – Email address to be used as sender
- Name – Display name of the account (your choice)
- Email: CC – Email address to receive a copy of the message (optional)
- Email: Reply-to – Email address for recipient replies (optional)
- Account Type – Select
-
After clicking Save, you can click Test to validate the account.
⚠️ The Solidsoft email account, created by default, cannot be deleted, as it is required to maintain communication with the GC Support Line.
📩 Document Association
After a successful test, go to:
Administration >> Email >> Documents
- Assign the selected account display name to each document type you wish to use it for.
🔐 Security Notes
If you’re using Gmail or Microsoft accounts, additional security requirements must be followed:
-
Gmail: follow the instructions at
Gmail Accounts - Simplified Setup -
Microsoft: follow the tutorial shown on the right side of the screen after selecting this account type.